Felt a Scarf with Melissa Arnold
Scarf Felting Class

 Melissa Arnold, textile artist and and inventive creator was our teacher for a scarf felting workshop. Pour yourself a cup of tea and learn a new creative outlet.
 Melissa's workshop started out with the viewing of beautiful batts of colorful wool. She buys her wool in Northern California from a woman near her home in Paradise, CA. Melissa makes her own batts for felting. She buys the raw wool, cards it combining it with silk, alpaca and cashmere. Then she dyes the carded wools in fantastic colors. All felting she teaches is done by hand, and she loves the feel and natural creation of these felted scarves.
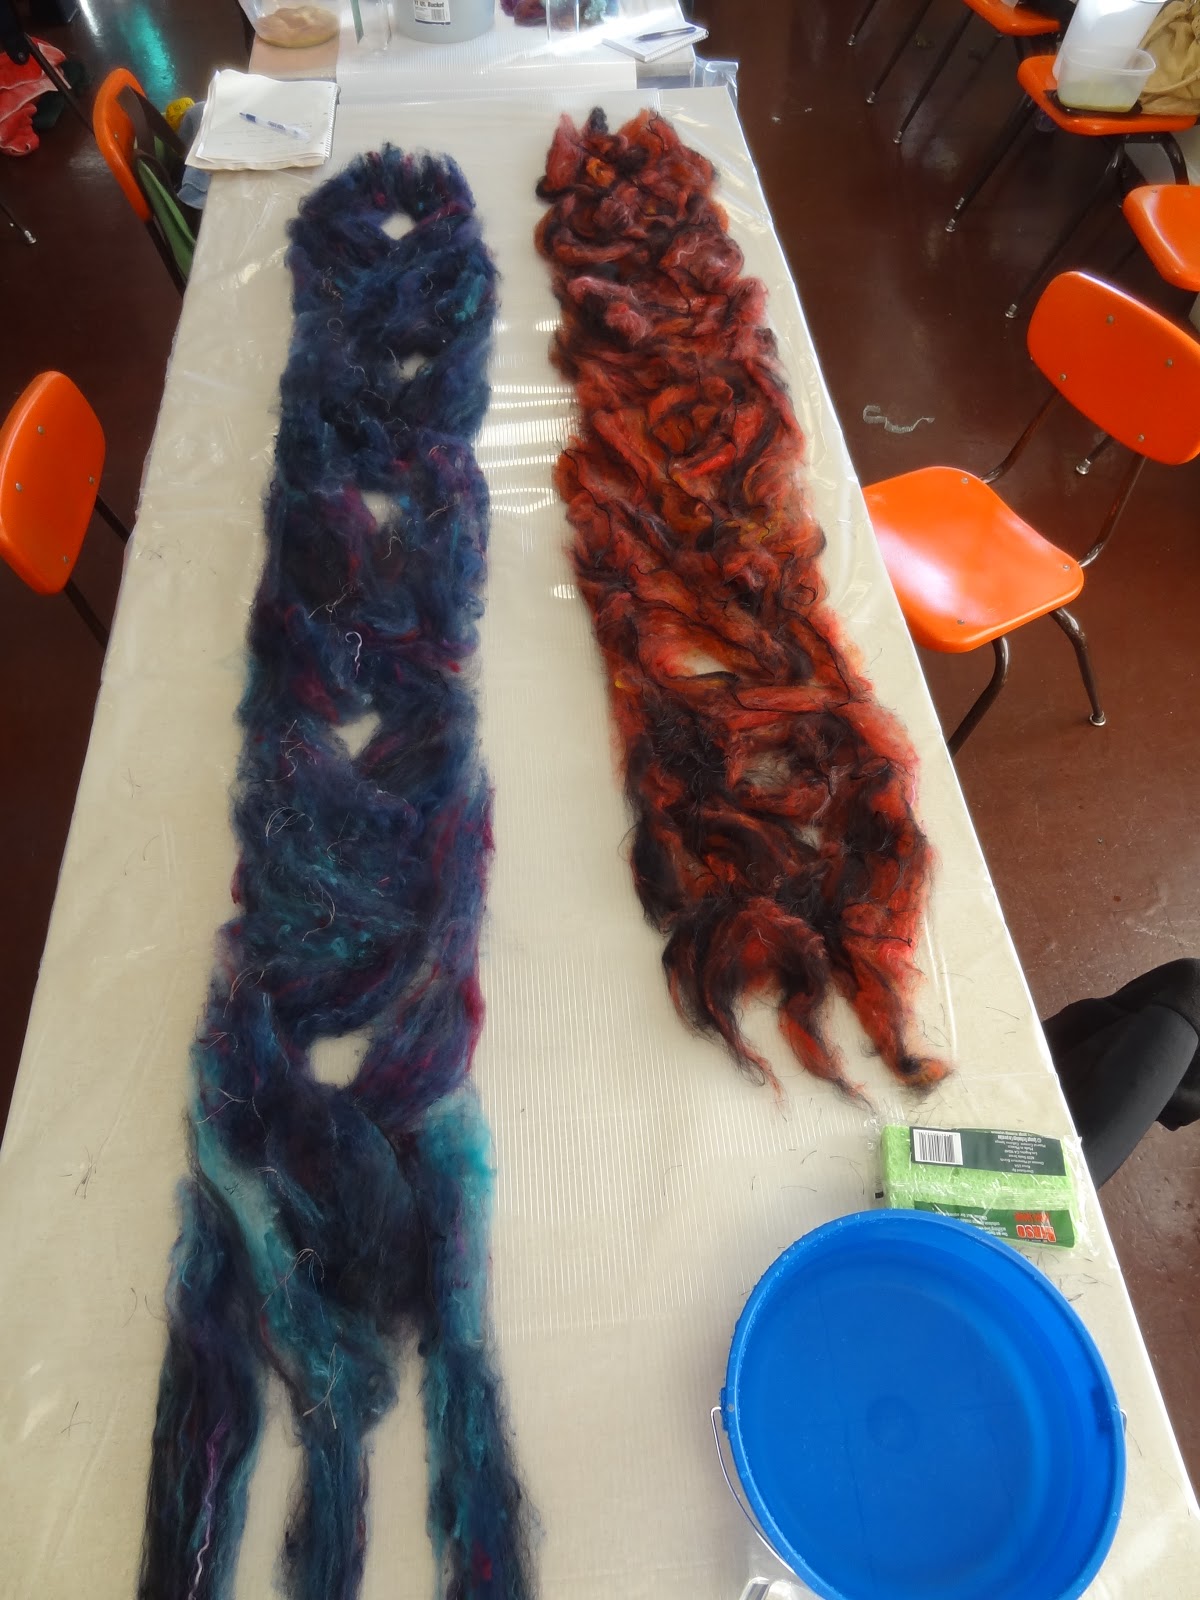
 Marlene chose reds with black and I chose the blue tones. Extra batts were only $12.00. I bought a green batt to do later on my own.
 Melissa had prepared the soap we would be using for the class. The “Kiss My Face” olive oil soap was low sudsing and felt fantastic on our hands.
 We separated each batt and made it into the scarf shape of our choice. We did not need a lot of supplies to buy. We used a bucket and spray bottle Fuji water bottle plus spray lid. Melissa’s soap is she made from bar soap shaved plus olive oil. Boy did our hands get soft!!!! Lots of rubbing and patting went on. We rubbed the fleece on mats that were ridged shelf liner material from Ace Hardware.
 This was not nuno felting so we did not use fabric. One of the techniques we learned was from Chad Alice Hagen http://www.chadalicehagen.com/ you will enjoy reading her blog too. We learned to make dreads if we wanted them......yes I tried a few at the ends.

Things I learned
· When laying your project down piece it in many directions to add interest

· We used Merino wool, one of the easiest to felt.
· Your project will end up ½ the size as you laid it out
· When wetting out your project, do not use too much soap, if there are bubbles everywhere it is too soapy.
· Always stretch your work in the fulling stage. (That’s when the wool is shrunk)
· In-between tossing pull the piece in all directions trying to stretch it back to size.
· Pre felts are sometime sold separately. Pre felts are wools that are not fully finished, they have been worked to the stage where they are beginning to mat, but not treated with hot water to shrink.
· Felted article shrinks in the direction it is rubbed
· Rinse all soap from your work when finished with clean tepid water
· Hot water is used in the final fulling stage. This encourages the shrinkage.

Always start small. This process took us more than four hours to make our scarves. We really enjoyed our class and the time we spent together. You can also make small samples to create pin cushions, glasses cases, pencil cases, features on bags or diaries. Maybe hot plate grabbers, needle cases, purses, phone covers, or cut up and used to create pictures, badges and other jewelry.
My scarf is wonderful and wraps beautifully around my neck. It feels very soft and light weight. The blended colors are wonderful and I know I will wear it on chilly days to come. We all enjoyed the class and appreciate Melissa as a teacher. She was “hands on” with every project always encouraging to each student. How fun to have a felted scarf as part of my wardrobe and be able to say I MADE IT
My scarf is wonderful and wraps beautifully around my neck. It feels very soft and light weight. The blended colors are wonderful and I know I will wear it on chilly days to come. We all enjoyed the class and appreciate Melissa as a teacher. She was “hands on” with every project always encouraging to each student. How fun to have a felted scarf as part of my wardrobe and be able to say I MADE IT

Everyone could tell Melissa enjoys teaching and sharing her creative ideas. If you’re interested in learning how to felt a scarf check out Melissa’s web site for class times and locations. www.melissaarnoldtextiles.com .
 A few people have asked me to post my finished scarf... so here it is...
posted by Unknown at
1:57 PM
![]()
![]()

0 Comments:
Post a Comment
Subscribe to Post Comments [Atom]
<< Home